PS3 Eye Camera Disassembly - A Step-by-Step Video Guide
This PS3 Eye Camera disassembly guide is based on our YouTube tutorial where we demonstrate the complete PS3 camera disassembly process!
While this article provides detailed written instructions, you can watch the full video tutorial on how to PS3 Eye Camera disassembly on DelanClip Youtube to follow along with the modification.
Introduction
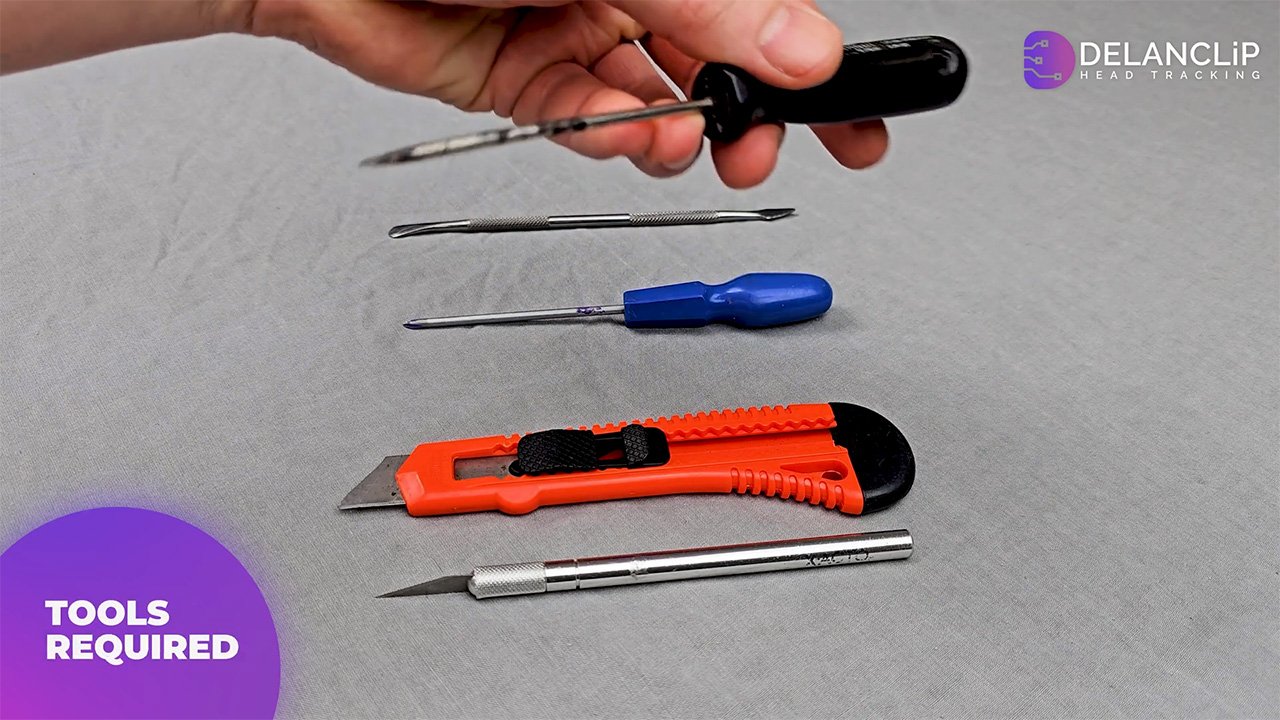
Tools and Preparation
Before you begin, make sure you have a clean, well-lit workspace and the following tools ready
Flat-head screwdriver or metal spudger
Ideal for prying open the case.
Small Phillips-head screwdriver (or star-shaped tool)
Needed for removing screws.
Rubber gloves (optional)
These help prevent fingerprints on sensitive components, especially the camera sensor.
Your PS3 Camera
This guide applies to both the curved and flat lens models.
Step-by-Step Disassembly Instructions
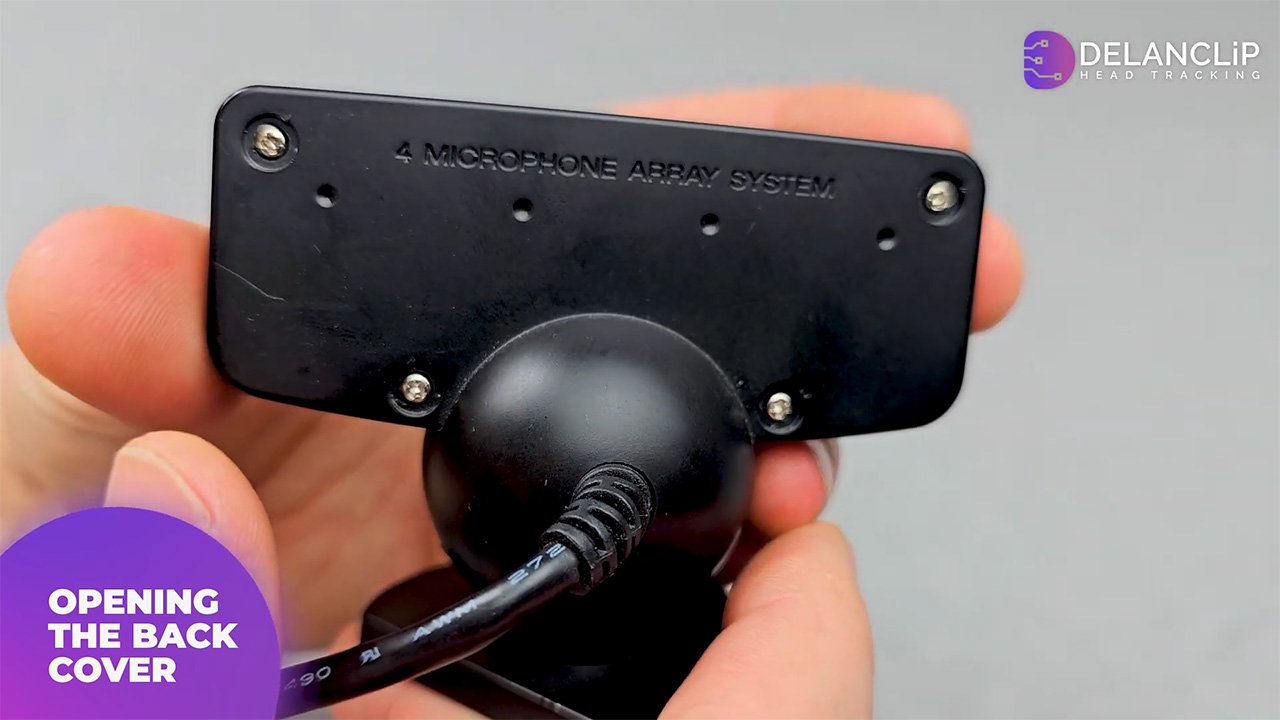
Opening the Rear Panel
Remove Screw Covers
If your PS3 camera has any hidden screw covers, carefully remove them with a sharp knife.
Unscrew the Rear Panel
Using your Phillips-head screwdriver, remove the four screws securing the rear panel of the camera.
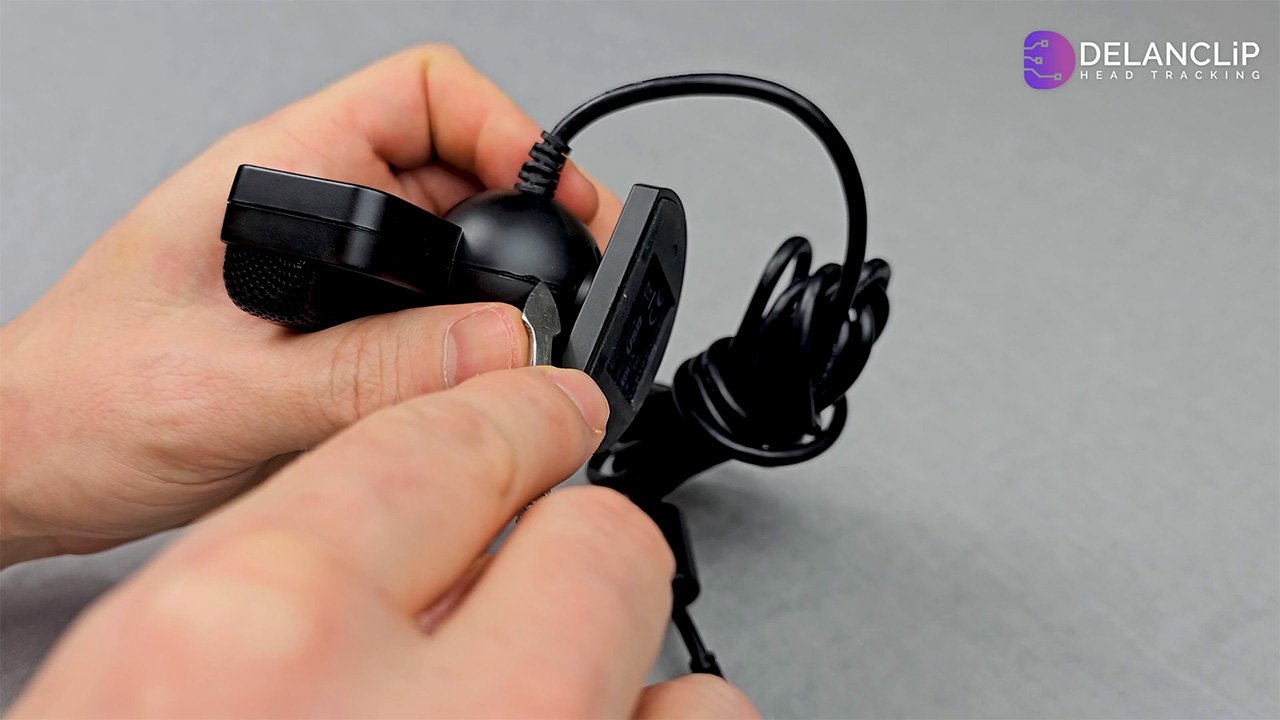
Prying Open the Back Cover
Rotate the Camera
Turn the camera’s stand so that its flat side faces you, providing a better work area. Using a flat-head screwdriver or metal spudger, carefully insert the tool near the bottom of the case. open the camera without damaging internal components.
Apply Leverage
Rest the camera and your left hand on the table to gain leverage. Use a controlled, firm motion to pry open the back cover.
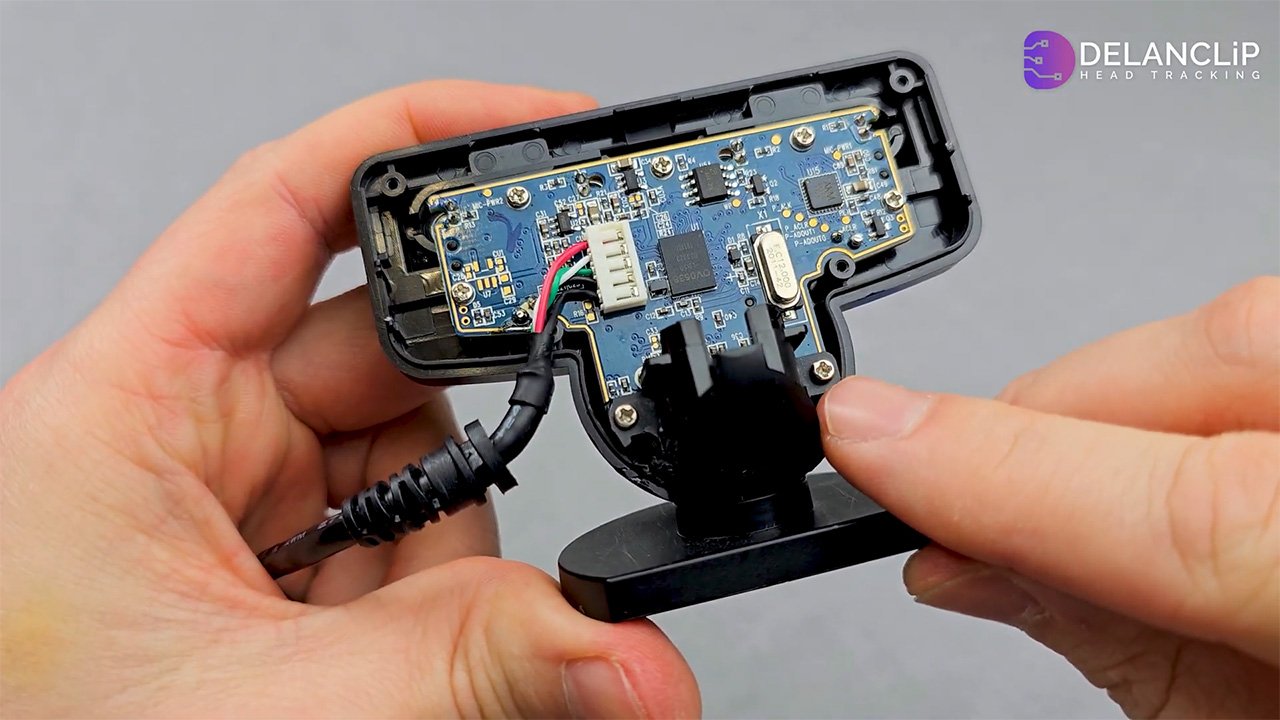
Removing the Camera Stand
Unscrew the Stand
Locate the two screws that secure the camera stand. Remove these screws—using a power screwdriver can speed up the process.
Detach the Stand
Once the screws are out, gently remove the camera stand.
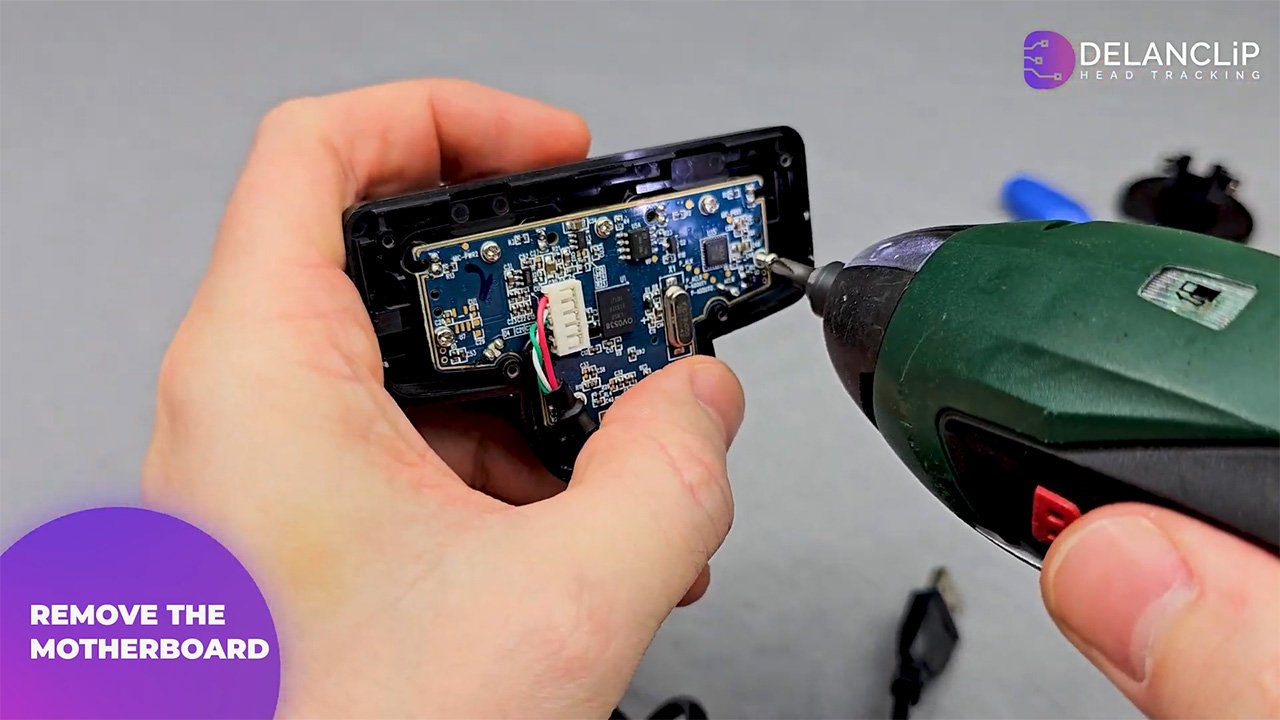
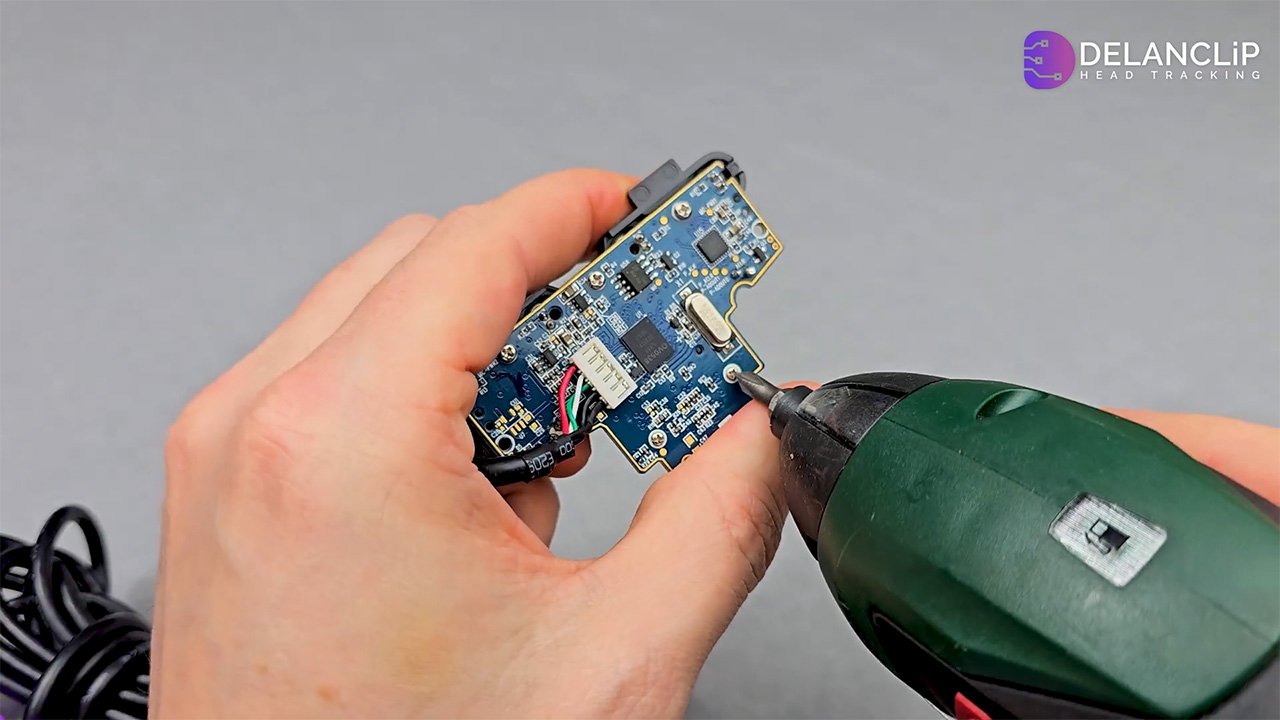
Removing the Motherboard
Remove Motherboard Screws
There are two screws that hold the motherboard in place. Remove both to free the board. Be patient we are almost there.
Lift Out the Motherboard
Carefully lift the motherboard to expose the internal layout of the camera.
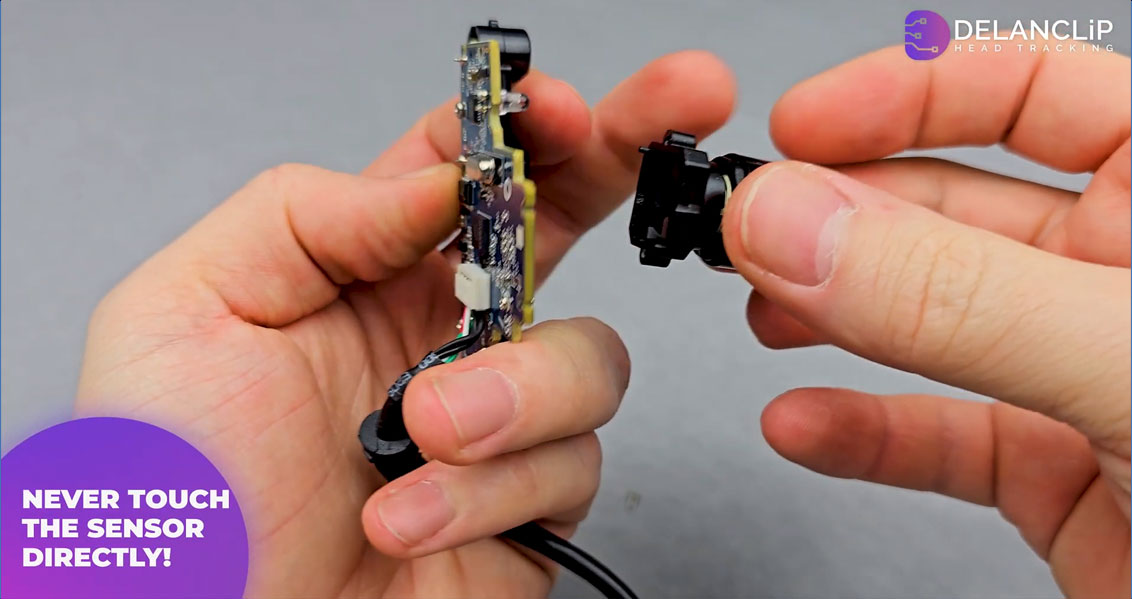
Removing the Camera Lens
Locate the Lens Screws
Identify the two tiny screws that secure the lens.
Unscrew the Lens
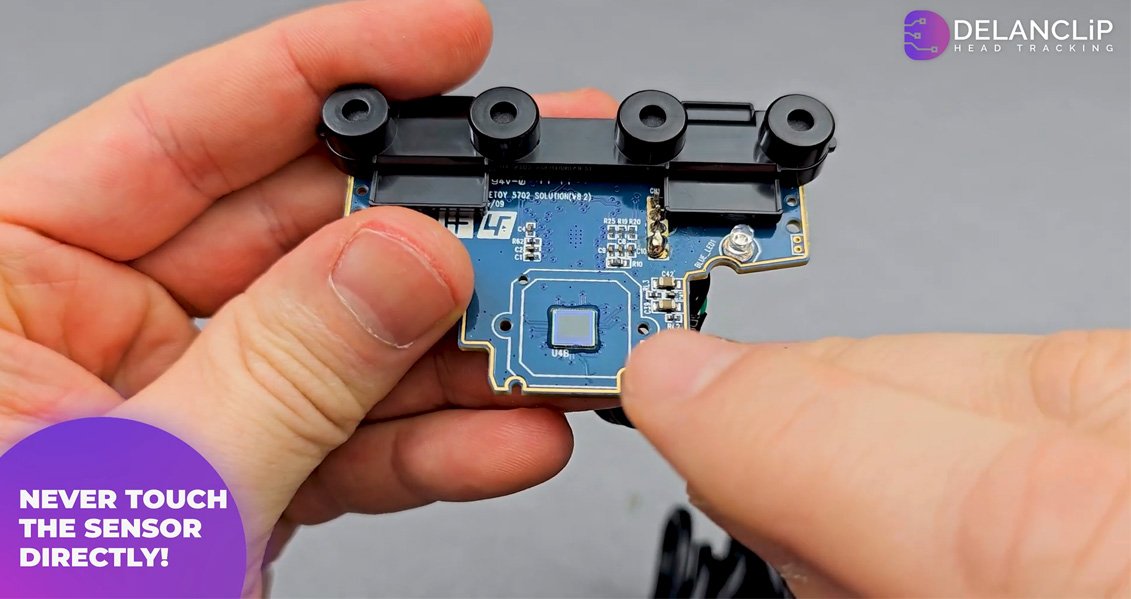
Remove these screws while holding the lens in place with your left hand. If available, wear rubber gloves to avoid fingerprints on the sensor.
Important Caution
Do not touch the camera sensor directly, as it is highly delicate and prone to damage.
Modification Possibilities
With the PS3 camera disassembled, you now have access to its internals and the ability to modify its functionality. Two popular modifications include
Head Tracking Modification
Modify the lens to allow infrared light to pass through. This alteration enables the camera to track head movements, which can enhance gameplay in simulators like DCS or Microsoft Flight Simulator, as well as other games that support head tracking.
Multitouch Table Conversion
Transform your PS3 camera into a multitouch sensor. This project requires additional research but can turn your camera into a versatile input device for creative projects.
For detailed instructions on these modifications, check out our related videos linked in the description.

Conclusion
By following these step-by-step instructions, you can safely disassemble your PS3 camera without damaging its delicate components. Whether you’re repairing your camera or exploring exciting modification possibilities, this guide provides a clear and professional roadmap to success. Feel free to leave a comment with any questions or share your own modifications. Happy modding!
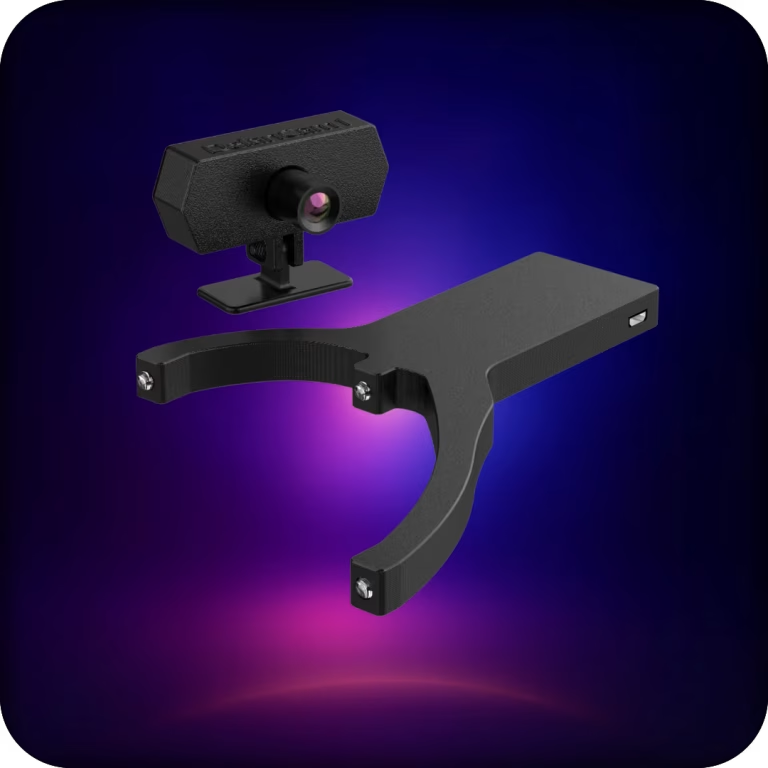
Wireless PC head tracking built for demanding gamers.
Delanclip Fusion Pro delivers premium, low-latency wireless tracking with universal PC sim compatibility.
It’s the best-value head tracker you can buy, pairing pinpoint precision with a clean, modern design for pro-grade performance without the pro-grade price.
- Cable-free experience, wireless head tracker
- Super precise Ir tracking, perfect for nighttime and daytime players.
- Windows and Linux compatible!
- Plug and play, no drivers needed.
- 2 year warranty
Original price was: £125.00.£107.99Current price is: £107.99.
Delivery:
UK: 1-3 days, £5.99
USA: 3-12 days, £19.99
EU: 3-12 days, £13.99
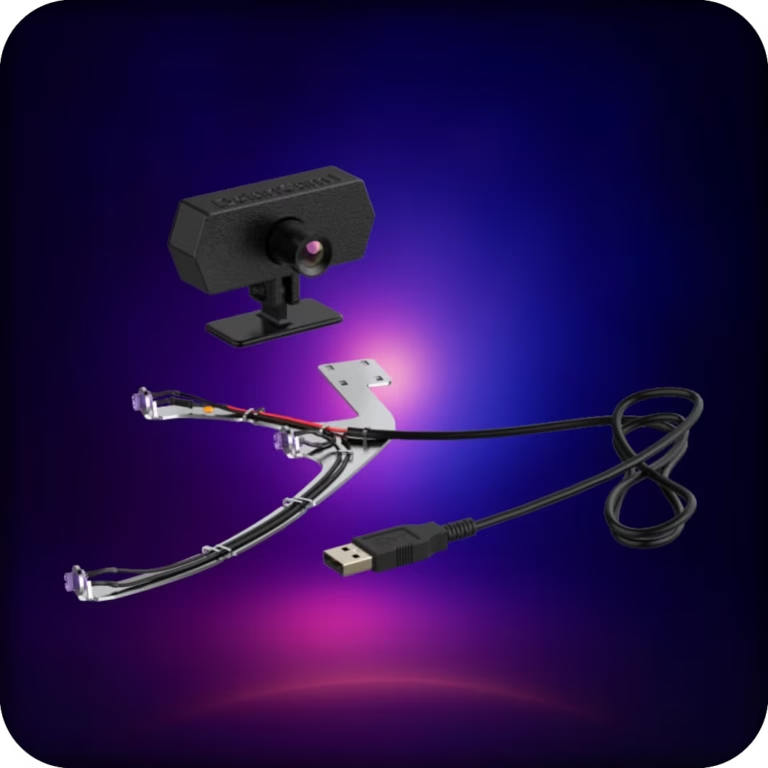
A reliable, affordable, all-in-one head-tracking setup. Plug in, clip on, and jump straight into ultra-precise IR tracking across your favorite PC sims.
This bundle uses our corded emitter and delivers the same tracking performance as Delanclip Fusion, just with a cable. Perfect for gamers who want pro-level precision and immersion without breaking the bank.
- Corded design and super precise Ir tracking (6DOF)
- Perfect for nighttime and daytime players.
- Windows and Linux compatibile!
- Plug and play, no drivers needed.
- 2 year warranty!
Original price was: £99.99.£71.99Current price is: £71.99.
Delivery:
UK: 1-3 days, £5.99
USA: 3-12 days, £19.99
EU: 3-12 days, £13.99